More Tips & Secrets You Probably Didn't Know Payday 3
Intro

It's no secret that I've been playing a hell of a lot of this game. I swear, it's not an addiction, man. I can play it any time I want. I swear so much so that I keep discovering really neat stuff either by playing the game or hearing about it from friends, so allow me once again to showcase more tips and secrets that you probably didn't know about each heist in Payday.
Gameplay mechanics
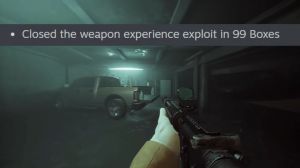
3 before we get to the more specific ones, I want to talk about two gameplay mechanics that are not so well known. Let's say you're doing a stealth run and there is a guard standing exactly where you need to get through, but his ass is not moving. You could wait there forever until the end of time, or if you equip your stealth build with a throwing knife, you can use it as a distraction.
What did I just hear? I know it blew my mind too. When I first saw it, I had no idea that the developers had actually implemented this super helpful feature. It is an extremely important thing. However, make sure that you do not have the skill selected, which will make your knife not break on impact because guards will see it as a suspicious object and start to search.
We need a grid-by-grid search, Something is The next one might already be known to a lot of you, but I still see people struggle with loot bags since the physics are less floaty than Payday 2. Moving a lot of them along a long path can become a chore, especially if you're playing alone. Instead of throwing them while standing, try launching them during a sprint; they'll travel more than the distance.
Better yet, if you slide and then throw them, they'll travel closer to the ground, rolling just a bit further once you're able to master this very simple mechanic. You'll be clearing any vault in a heartbeat.
No rest for the wicked

Let's start off with the heist-specific stuff by telling you how to always know where the Escape van is going to show up on loud whenever you get to the main road. Keep an eye out for the big SWAT truck blocking the street. Whichever side he picks is the side that you don't want to be on.
Get to the opposite side and start stockpiling your money. The van will arrive shortly. After, hle up and throw the bag. I also have an addition from the previous article where I mentioned the location of the three saves.
Road rage
While you're setting up the path for the van, don't forget to open up the fence to create a secondary path to do so.
You can simply follow the wire from the gate to the fuse box and interact with it once you're scoring the vehicle. There is a 50/50 chance that instead of turning right, you'll pass through defense on the left, reaching your final destination. I also want to take the occasion to say that I'm aware that the game has special heist-related favors.
However, they're earned only randomly after completing a heist; sometimes you won't even be earning one at all, which is why you won't see me advising you to select a specific one in these types of articles since they're so limiting. Anyway, to be clear, this will be the only mention in this article about those specific heist-related favors.
Dirty ice

If you go to the back alley, you can hear some faint meows coming from the storm. Drain, there is no confirmation that this is actually Irwin; nevertheless, this is the only distressed cat you can hear in the whole game, so it's got to be him. Please star Bris. Let us save him. Finders Keepers, a lot of people have been asking in the other article how to get the manager to open up the workshop without triggering the assault, so let me explain it as clearly and quickly as possible.
First of all, make sure to inspect the workshop entrance inside the VIP room to trigger the objective. After that, you're going to need to access the basement. The keypad code is going to be either the manager's employee number, the Wi-Fi password, or a scribble in the VIP room. Once you're through, you'll have to crack the safe in the small room and snap some pictures of the documents.
You'll have to get back upstairs. get into the manager's office and patch shade through the phone. She'll threaten the manager into leaving the jewelry store, passing from the VIP room. Wait for her over there, grab her, and let her kindly open the door for you.
Rock the cradle

By now, you're probably tired of that goofy ass music to distract the bouncer—or maybe not. I'm not one to judge, and you'd like to find a way to access the VIP room much faster. Don't worry, because if you sneak your way into the room next to the entrance and sprint while leaving it, the bouncers will investigate that suspicious noise coming from that other room.
This will give you the opportunity to swipe the key card and open the door right in front of their incredibly smart faces. There is a catch though: that room won't be marked in a secure area unless you're playing on very hard or overkill, so you won't be able to sprint to GA attention on lower difficulties.
Thankfully, you can use the knife trick I've mentioned earlier to lure them in, as I heard. Congratulations! You've made it downstairs, and you're on your way to complete the objectives for the crypto wallet. Most of you know the best way to reach the other side of the room is to get on top of the ventilation system on the right, undetected by all the bystanders on the ground.
Well, once you're up there, if you face this side, you will find this little girl. He might be a reference to my friend Pedro, or perhaps the level designer just felt like adding a funny little character. Who knows for the last tip, if you're planning to forfeit any stealth attempt, this is another heist where the zip line is a must.
Some people were confused in the previous article on how to get it, so here's a quick explanation: from the main menu, select the vendors tab, and scroll all the way down. You'll find the four purchasable favors, the zip line being one of them. I highly recommend you stock up once in a while before heisting.
Anyway, for this one, set it up in the elevator shaft and throw all the bags you can find on it; it'll bring them very close to the extraction zone, and you won't risk getting stuck in the narrow stairs on the way.
Under the surphaze

Don't feed the sharks. I ain't no marine biologist; however, I doubt that New York has shark-infested water.
Gold & sharke
So it seems I have missed a pretty clear Easter egg from this heist. Not being an anime fan, the whole team just flew over my head, so I'm sorry; please don't crucify me. One objective requires you to find the red key card to progress from one of the lone officer offices; those are named Liam Akerman.
Eric Jagger and Rees's Brown are the family names of some of the main characters from the manga and Show Attack on Titan, like Levy Akerman. Aaron Jagger and Riner Brown: I wish I could elaborate more, but like I said, I don't really watch.